Running Local LLMs on Raspberry Pi 5 is now practical thanks to the Raspberry Pi AI HAT+ 2, powered by the Hailo-10H AI accelerator. This guide walks you through the entire setup process step-by-step, from installing Raspberry Pi OS to running a ChatGPT-style web interface — all locally, offline, and with full data privacy.
This article is written to be simple, beginner-friendly, and SEO-optimised. A full YouTube video walkthrough is embedded in this page, with exact timestamps listed in the Video Timings section so you can jump to any step instantly.
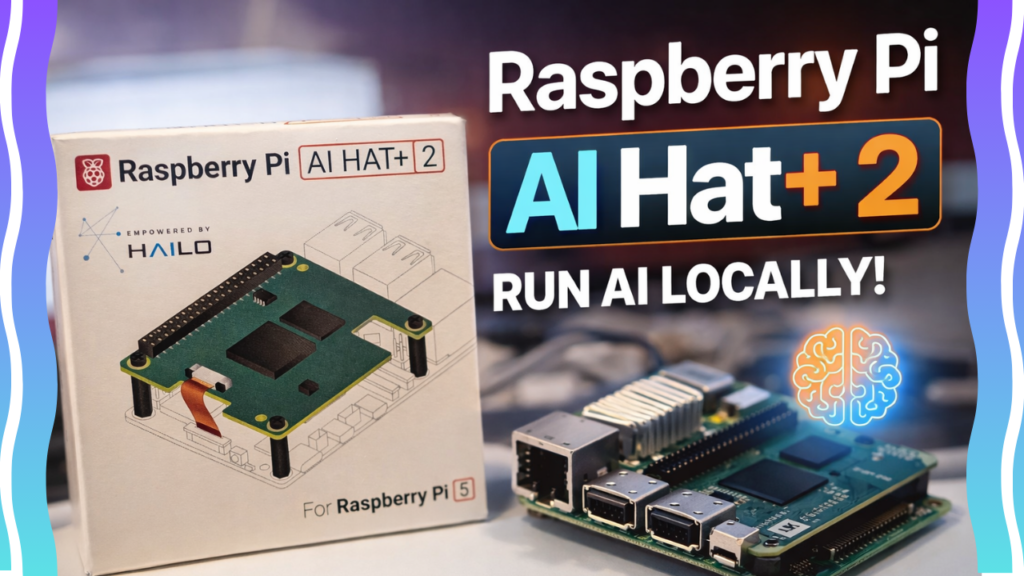
What Is the Raspberry Pi AI HAT+ 2 (Hailo-10H)?
The Raspberry Pi AI HAT+ 2 is an official add-on board for the Raspberry Pi 5 designed for generative AI at the edge. It is built around the Hailo-10H accelerator and includes 8GB dedicated AI RAM, allowing it to run LLMs and VLMs locally without using your Raspberry Pi’s system memory.
Why AI HAT+ 2 Is Ideal for Local LLMs
Because inference runs on the HAT, you get:
Lower latency
Better performance
Improved system responsiveness
No cloud dependency
This makes the AI HAT+ 2 ideal for offline AI, robotics, industrial control, and privacy-sensitive applications.
Key Features and Capabilities
Hailo-10H AI accelerator delivering up to 40 TOPS (INT4)
8GB dedicated RAM for AI workloads
Supports LLMs and VLMs such as:
Text generation
Translation
Speech-to-text
Visual scene understanding
PCIe Gen 3 interface
Automatically detected by Raspberry Pi OS
Native support in rpicam-apps for hardware-accelerated camera pipelines
Technical Specifications
| Specification | Details |
|---|---|
| AI Accelerator | Hailo-10H |
| AI Performance | Up to 40 TOPS (INT4) |
| On-board Memory | 8GB dedicated RAM |
| Interface | PCIe Gen 3 |
| Operating Temperature | 0°C – 50°C |
| Production Lifetime | Until at least January 2036 |
| List Price | $130 |
AI HAT+ vs AI HAT+ 2 Comparison
| Feature | AI HAT+ | AI HAT+ 2 |
|---|---|---|
| Accelerator | Hailo-8L | Hailo-10H |
| Performance | 26 TOPS | 40 TOPS |
| Best Use | Computer Vision | Generative AI (LLMs & VLMs) |
| On-board RAM | Shared | 8GB Dedicated |
| LLM Support | Limited | Designed for LLMs |
Who Is This Guide For?
This guide is ideal if you:
Want to run ChatGPT-style AI locally on Raspberry Pi
Care about data privacy and offline operation
Are exploring LLMs, GenAI, or edge AI
Are building robotics or camera projects
This guide may not be ideal if:
You only need lightweight CPU AI
You require large cloud models
You are not using Raspberry Pi 5
What You Will Need
Raspberry Pi 5
Raspberry Pi AI HAT+ 2 (Hailo-10H)
Raspberry Pi OS (Debian 13 – Trixie)
Internet connection (for downloads only)
Basic terminal access
Step-by-Step Setup Guide (Beginner Friendly)
Step 1 — Install Raspberry Pi OS (Trixie)
The videos below show both ways to do this. The text instructions can be found here:
Full Video Instructions
Longer form video with explanations
Shorter form video with only the process
Step 2 — Add the Hailo Test Repository
sudo tee /etc/apt/sources.list.d/hailo.sources <<EOF
Types: deb
URIs: https://hailo:chahy5Zo@extranet.raspberrypi.org/hailo
Suites: trixie
Components: main
Signed-By: /usr/share/keyrings/raspberrypi-archive-keyring.pgp
EOF

sudo apt update
sudo apt full-upgrade -y
sudo reboot
Step 3 — Install Docker (Required)
Docker is required because Open WebUI is not compatible with Python 3.13 on Trixie.
sudo apt remove $(dpkg --get-selections docker.io docker-compose docker-doc podman-docker containerd runc | cut -f1)
sudo apt install docker.io -y
sudo docker run hello-world
Step 4 — Install Hailo Drivers and Runtime
sudo apt install dkms
sudo apt install hailo-h10-all
sudo reboot
Step 5 — Download and Install Install HailoRT and Model Zoo
sudo dpkg --install hailort_5.2.0_arm64.deb hailort-pcie-driver_5.2.0_all.deb hailo_gen_ai_model_zoo_5.2.0_arm64.deb
Step 5a — If you get a dependency error
This command removes older or incompatible Hailo and camera-related software to prevent errors during installation. It then installs the correct Hailo AI software and automatically fixes any missing parts so everything works properly.
sudo dpkg -r rpicam-apps-hailo-postprocess python3-h10-hailort hailo-h10-all h10-hailort && sudo dpkg --install hailort_5.2.0_arm64.deb hailort-pcie-driver_5.2.0_all.deb hailo_gen_ai_model_zoo_5.2.0_arm64.deb && sudo apt-get -f install
Verify the install
hailortcli scan
Step 6 — Start the Hailo Ollama Server
hailo-ollama
Step 7 — Download LLM Models
Get a list of all the models available
curl --silent http://localhost:8000/hailo/v1/list
Download "qwen 1.5b"
curl --silent http://localhost:8000/api/pull \
-H 'Content-Type: application/json' \
-d '{ "model": "qwen2:1.5b", "stream" : true }'
Download "deepseek r1 1.5b"
curl --silent http://localhost:8000/api/pull \
-H 'Content-Type: application/json' \
-d '{ "model": "deepseek_r1:1.5b", "stream" : true }'
Download "llama 3.2"
curl --silent http://localhost:8000/api/pull \
-H 'Content-Type: application/json' \
-d '{ "model": "llama3.2:1b", "stream" : true }'
Download "qwen 2.5 coder"
curl --silent http://localhost:8000/api/pull \
-H 'Content-Type: application/json' \
-d '{ "model": "qwen2.5-coder:1.5b", "stream" : true }'
Step 8 — Send a Test Query
curl --silent http://localhost:8000/api/chat \
-H 'Content-Type: application/json' \
-d '{"model": "qwen2:1.5b", "messages": [{"role": "user", "content": "Translate to French: The cat is on the table."}]}'
Step 9 — Install Open WebUI (Frontend)
Pull/Download Open WebUI
docker pull ghcr.io/open-webui/open-webui:main
Step 9a — To no longer use "sudo"
This command gives your user permission to use Docker, applies the change immediately without rebooting and without you having to do “sudo” again, and then downloads the Open WebUI Docker image so it is ready to run.
sudo usermod -aG docker $USER && newgrp docker && docker pull ghcr.io/open-webui/open-webui:main
Launch WebUI and Setups Docker Container
docker run -d \
-e OLLAMA_BASE_URL=http://127.0.0.1:8000 \
-v open-webui:/app/backend/data \
--name open-webui \
--network=host \
--restart always \
ghcr.io/open-webui/open-webui:main
Step 10 — Access from Web Browser
Go to the web browser on the Raspberry Pi and enter the following. Please remember to remove the “s” from https:
http://127.0.0.1:8080
Step 11 — If you reboot
This command starts the Docker service, launches the Open WebUI container, and then checks whether the Hailo Ollama service is already running, starting it only if it is not.
After you do the below, you go to the browser and enter the address again.
Copy and paste this into the terminal:
sudo systemctl start docker && docker start open-webui && pgrep hailo-ollama || hailo-ollama
Copy and paste this into your web browser on the Raspberry Pi:
Troubleshooting & Common Issues
Hailo drivers not detected
If the HAT is not detected, reboot and check the PCIe connection.
hailortcli scan
Hailo drivers not detected
Make sure Docker is installed and running:
sudo systemctl status docker
FAQs
Can Raspberry Pi really run LLMs?
Yes. With the Hailo-10H, small and efficient LLMs run locally with hardware acceleration.
Is an internet connection required?
Only for downloading models. Inference runs fully offline.
Is my data sent to the cloud?
No. All processing happens locally.
Why is Docker required?
Docker avoids Python compatibility issues and ensures Open WebUI runs reliably.
Brilliant work – just to say that if you reboot your Raspberry PI – you will need to re-enter the command “hailo-ollama” in the terminal, to res-start the AI server. I’m sure that there is a way to do this automatically on startup?
Cannot install step 5…
h10-hailort conflicts with hailort… the classic Linux dependency shit that shows that there are software engineers… only software amateurs… so frustrating.
Not blaming you, great effort to put this together…
I am in the middle of updating the blog post and making a new shorter video that shows how to fix that.
I tried to replicate the process and each time I got different errors.
Try this to fix that issue and please let me know if it works.
It should remove the conflicts then reinstall.
sudo dpkg -r rpicam-apps-hailo-postprocess python3-h10-hailort hailo-h10-all h10-hailort && sudo dpkg –install hailort_5.2.0_arm64.deb hailort-pcie-driver_5.2.0_all.deb hailo_gen_ai_model_zoo_5.2.0_arm64.deb && sudo apt-get -f install
Had the same issue and had to remove and align the 5.2.0 PCIe driver by cleaning up the and then removing the h10-hailort-pcie-driver and updating (make sure this is your problem as well before running any of this)
# dpkg -l | egrep ‘hailo|hailort|h10’
If you see h10-hailort-pcie-driver installed, that’s the same issue I was having.
# sudo apt-get remove –purge -y h10-hailort-pcie-driver
Then install the 5.2.0 driver
# sudo dpkg -i hailort-pcie-driver_5.2.0_all.deb
# sudo apt-get -f install -y
# sudo reboot
Then check it out to make sure it’s aligned
# hailortcli –version
hailortcli should show 5.2.0
# lsmod | grep -i hailo
This should show something like hailo1x_pci 147456 0
Then you can continue on.
I’d also suggest you add in some scripts to auto start everything on reboot as opposed to having to log in to start everything.
# sudo systemctl enable docker
Create a systemd service for hailo-ollama
# sudo vi /etc/systemd/system/hailo-ollama.service
Paste this in (exactly)
[Unit]
Description=Hailo Ollama Runtime
After=network-online.target docker.service
Wants=network-online.target docker.service
[Service]
Type=simple
ExecStart=/usr/bin/hailo-ollama
Restart=always
RestartSec=3
Environment=HAILO_LOG_LEVEL=info
# Give hardware access time to settle
ExecStartPre=/bin/sleep 5
[Install]
WantedBy=multi-user.target
Enable it
# sudo systemctl daemon-reload
# sudo systemctl enable hailo-ollama
Ensure the OpenWeb UI auto-starts
# docker update –restart unless-stopped open-webui
Extra Credit – Install and enable Avahi (mDNS) if you want to be able to hit the UI via your_hostname.local:8080
# sudo apt update
# sudo apt install -y avahi-daemon avahi-utils
# sudo systemctl enable avahi-daemon
# sudo systemctl start avahi-daemon
Thank you so much for sharing your solution.
Is there any posibility to add other LLMs myself?
Speaking with someone from the Hailo company, will do some tests and get back to you.
If i don’t by the weekend, please remind me.
Do you have any news on this?
Hi.
Nothing from Hailo.
However, I was speaking to ChatGPT about if this was possible it gave the below. this is something I do want to try. if you manage to try it before I do and get positive results, please do share.
⚙️ How to add your own LLM (overview)
If you want to deploy a custom small LLM:
1. Choose a lightweight model
Examples that can realistically fit after quantization:
TinyLlama-1.1B
Phi-1.5 (~1.3B)
GPT-2 Small/Medium
DistilGPT-2
(These may still require pruning/quantization.)
2. Convert to ONNX
For PyTorch:
torch.onnx.export(model, dummy_input, “model.onnx”)
3. Quantize it
You’ll need post-training quantization (PTQ) because the NPU uses int8.
Examples:
ONNX Runtime quantization
Hailo PTQ tools
4. Compile with Hailo Model Compiler
This produces an HEF file runnable on the NPU:
hailomc model.onnx -o model.hef
5. Deploy via HailoRT on the Raspberry Pi
Then load the compiled model with:
from hailo_platform import Hef, VDevice
🧠 Realistic expectations
Running LLMs on this hardware is possible only for small, heavily optimized models.
You will not get ChatGPT-level performance, but you can build:
Offline chatbots
Code assistants (tiny models)
Keyword extraction
Embedding/semantic search
Action-based AI agents
I got all the way trough the tutorial and than I failed…
It says this: 500: open webui 500 open webui: server connection error
How can I solve this?
Be sure to remove the “s” in the http.
It comes out as “https” it should be “http”.
I think I had a similar issue when I did it.
Or, reboot then restart the ollama server and try connecting again.
Please let me know how it goes.
Still the same error…
I will update over the weekend or as soon as I can. I got some information that might help in general and will share.
If I can find some way to store it, I will even add my personal image (img file) if possible, with it all working.
Hi. Still working my way through stuff.
I went back to the webstie and tried these instructions and they seem to work as well: https://www.raspberrypi.com/documentation/computers/ai.html#software
SUPER! I really appreciate what you do.
I keep getting this error:
HailoRT] [error] CHECK failed – Failed to create vdevice. there are not enough free devices. requested: 1, found: 0
[HailoRT] [error] CHECK_SUCCESS failed with status=HAILO_OUT_OF_PHYSICAL_DEVICES(74)
[HailoRT] [error] CHECK_SUCCESS failed with status=HAILO_OUT_OF_PHYSICAL_DEVICES(74)
[HailoRT] [error] CHECK_SUCCESS failed with status=HAILO_OUT_OF_PHYSICAL_DEVICES(74)
[HailoRT] [error] CHECK_SUCCESS failed with status=HAILO_OUT_OF_PHYSICAL_DEVICES(74)
[HailoRT] [error] CHECK_SUCCESS failed with status=HAILO_OUT_OF_PHYSICAL_DEVICES(74)
I |2026-02-11 23:56:22 1770825382377928| generation_context:got notified
I will make another video but try going from a fresh install then using instructions directly from here: https://www.raspberrypi.com/documentation/computers/ai.html#software
I am doing another round of testing before I post another video, but it seems to work, it does not use version 5.2.0 though.