
Build a 4-bay NAS with Raspberry Pi 5 + Radxa Penda HAT
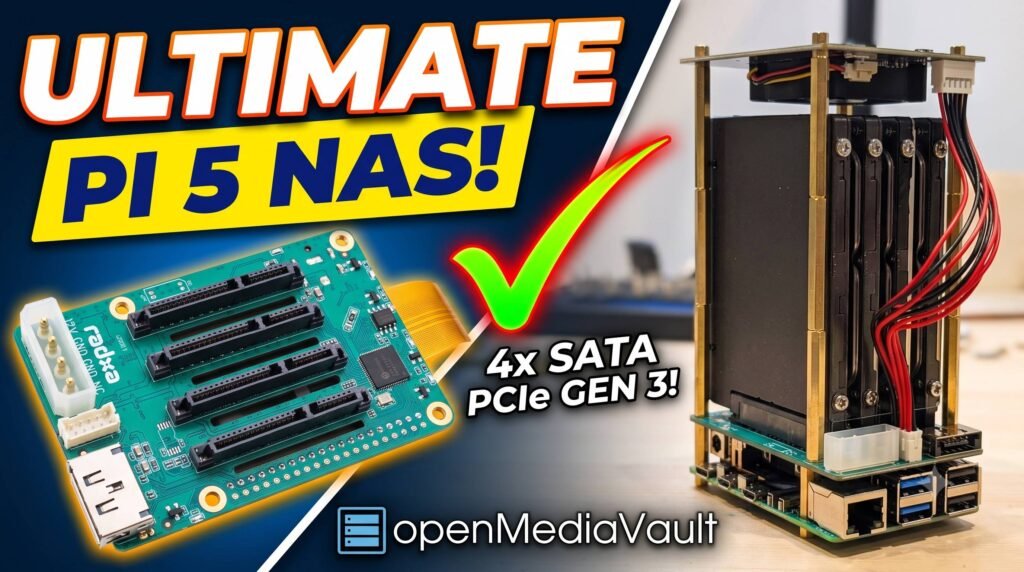
Building a high-performance Network Attached Storage (NAS) server traditionally required expensive enterprise hardware or power-hungry desktop towers. Thanks to the processing power and hardware architecture shifts of the Raspberry Pi 5, you can now deploy a screamingly fast, energy-efficient 4-bay home storage server right on your desk.
In this definitive guide, we will walk you through transforming a Raspberry Pi 5 (4GB) and the Radxa Penta SATA HAT into an ultra-reliable, private cloud server running OpenMediaVault (OMV). Whether you want to replace expensive cloud subscriptions like Google Drive or Microsoft OneDrive, run a local media server, or expand your home lab infrastructure, this guide covers everything from unboxing the components to mapping your network drives in Windows.
Video instructions: Raspberry Pi 5 NAS: Radxa Penta HAT + OpenMediaVault 4-Bay Setup
Hardware Required & Bill of Materials
To guarantee absolute system compatibility, native kernel driver integration, and thermal safety, use the exact components listed below:
| Component | Specification / Variant Used | Purpose |
|---|---|---|
| Single Board Computer | Raspberry Pi 5 (4GB RAM) | Core processing node with integrated PCIe bus. |
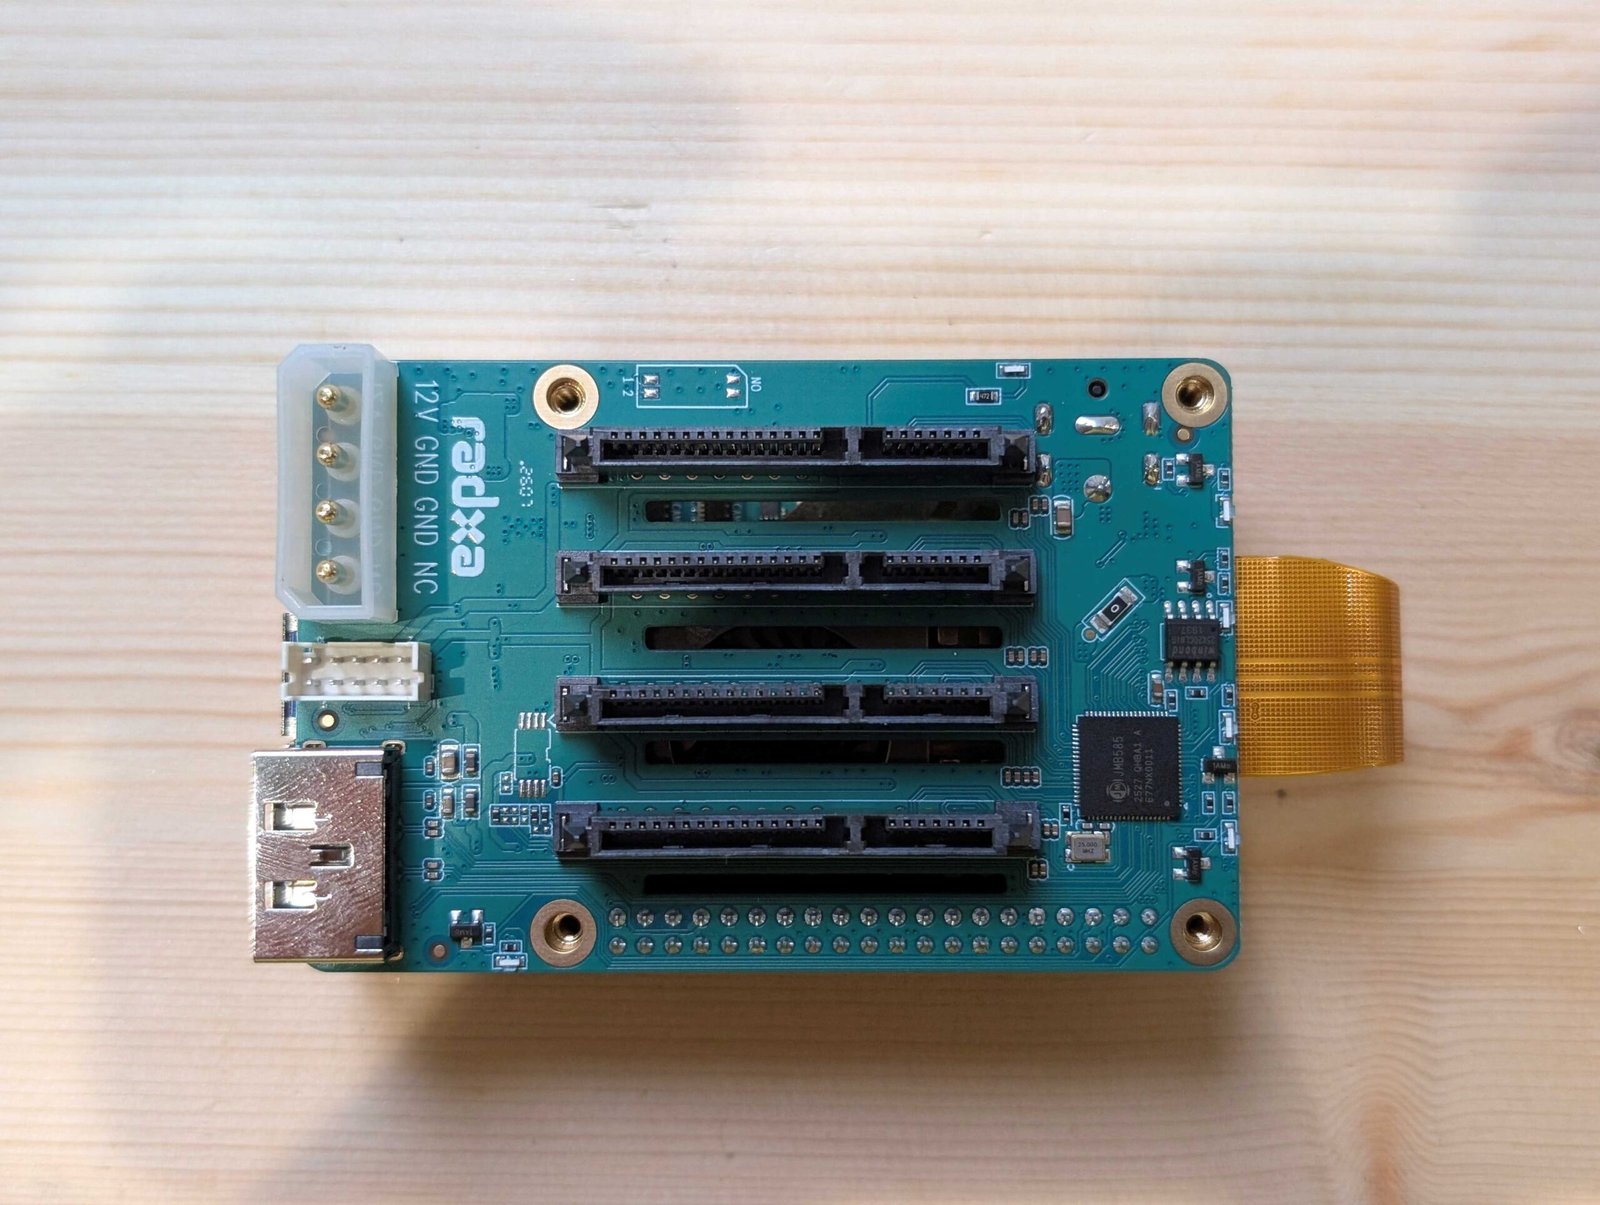
| SATA Expansion Board | Radxa Penta SATA HAT | Converts single-lane PCIe into 4 native SATA interfaces. |
| Enclosure Cap Assembly | Radxa Penta Top Board | Houses active PWM cooling fan and I2C OLED screen. |
| Thermal Assembly | Official Raspberry Pi Active Cooler | Dedicated system processor copper block and fan. |
| Operating System Drive | 32GB MicroSD Card (High Endurance) | Fast, redundant system volume for headless storage. |
| Main Storage (Array A) | 2 × 500GB Solid State Hybrid Drives (SSHD) | Configured in high-speed RAID 0 for cache tasks. |
| Backup Storage (Array B) | 2 × 500GB Solid State Drives (SSD) | Configured in mirrored RAID 1 for critical data backup. |
| Power Supply | 12V 5A (60W) Regulated DC Adapter | Supplies clean power directly to all 4 SATA drives. |
| Network Interface | Cat6 Gigabit Ethernet Cable | Hardwired link straight to the home network router. |
Why Upgrade to a Native PCIe Raspberry Pi 5 NAS?
If you are currently running an entry-level home server using an older Raspberry Pi 4 or Raspberry Pi 400 with a USB SSD, you are likely familiar with the bottleneck limitations of the shared USB bus layout.
The Core Benefits of This Build:
- Goodbye USB, Hello PCIe: The Raspberry Pi 5 includes an external single-lane PCIe interface. Connecting the Radxa Penta HAT directly via this lane bypasses the USB stack entirely, delivering native SATA controller stability.
- True RAID Container Arrays: Running multiple drives over USB bridges is highly unstable. With direct SATA lines, we can safely leverage Linux
mdadmsoftware storage configurations for high safety data setups. - App Deployment Platform: This build lays the foundation for running local containerized applications. You will have plenty of power to run future Docker microservices, a Jellyfin media streaming platform, private photo libraries via Immich, or self-hosted productivity layers with Nextcloud.
Step-by-Step Hardware Assembly Guide
Assembling a multi-tier physical server stack requires close attention to your hardware modifications. Follow these sequential steps to ensure adequate cooling and proper ribbon cable alignment.
Step 1: Install the Official Active Cooler
Unbox your Raspberry Pi 5. Ensure the pre-applied thermal pads on the underside of the Official Active Cooler are intact. Align the locking push-pins with the matching holes on the Pi 5 circuit board and press down firmly until they click into place. Plug the cooling fan connector directly into the dedicated fan port on the Pi 5.
Step 2: Modify the Cooler Retaining Pins
Because the Radxa Penta HAT sits directly over the top of the Pi 5 board, the plastic push-pins on the cooler can create a physical clearance issue. Use small pliers to carefully clip off or adjust the excess plastic height on the top of the cooler pins. This ensures the extension board can sit level on its brass standoffs.
Step 3: Interconnect the PCIe Ribbon Cable & Modify Heatsink Fins
Gently pop open the delicate plastic locking gate on the Pi 5 external PCIe lane port. Insert the flexible flat ribbon cable provided with your Radxa HAT, making sure the gold contact points face the correct way. Push the locking gate closed to secure the ribbon.


Step 5: Connect Top Board Fans and LCD Status Screen
Attach the secondary PWM cooling fan and I2C OLED screen wires to the header connections on the top of the Radxa Penta HAT. Position the final protective top plate module over the drive stack assembly and secure the entire structure using the remaining casing screws.


Flashing the System Software Engine
A headless server operates efficiently without an attached monitor or keyboard graphic interface. We use a lightweight operating system configuration to save processing power.
Flashing Raspberry Pi OS Lite
- Connect your MicroSD card reader to a computer and launch the official Raspberry Pi Imager application.
- Under “Operating System”, select Raspberry Pi OS Lite (64-bit). This clean version omits desktop interfaces, keeping resource usage to a minimum.
- Select your target storage card.
- Open the Advanced Settings menu layout panel (the gear icon).
- Enable SSH, specify a unique system host name, set a strong username and password, configure your local Wi-Fi parameters if necessary, and choose your preferred regional time zones.
- Click Write to flash the system image. Once completed, insert the card into your Raspberry Pi 5 slot, connect a Cat6 Ethernet cable from your network router, and plug the 12V 5A power supply barrel into the Radxa HAT input port.
Configuring the PCIe Interface & Radxa Support
Open your computer’s terminal program or a utility like PuTTY to connect directly to your new server over the home network.
This command opens a remote, secure shell session into the backend command prompt of your headless single board server.
This instruction updates your system package catalogs and downloads security modifications.
Step 1: Enable the PCIe Interface and Force Gen 3 Speeds
By default, the Raspberry Pi 5 runs its external bus connection at standard Gen 2 performance settings. We can modify system files to unlock high-speed PCIe Gen 3 transfer throughput for our storage array.
This instruction opens the system hardware configuration options file using the text editor tool.
Scroll down to the bottom of the config file and append these line settings configurations to the end of the text parameters:
dtparam=pciex1_gen=3
Press Ctrl+O followed by Enter to write out the data modifications, and hit Ctrl+X to close out the editing panel interface.
Step 2: Install Radxa Driver Compatibility Modules
To ensure the system can communicate with the onboard fan management lines and read tracking metrics to the physical OLED display screen, run the Radxa automated installation script:
This automated instruction downloads and configures the driver service modules for the Penta HAT.
This instantly safe-reboots the hardware processor system architecture configuration layout.
This display utility checks and prints out all active hardware nodes attached directly to the internal PCI Express lanes interface.
Installing & Upgrading OpenMediaVault
With the underlying system operating system updated and running at high PCIe Gen 3 speeds, we can deploy the core storage administration interface engine.
This script automatically fetches the code files, sets up dependencies, and installs the OpenMediaVault dashboard platform.
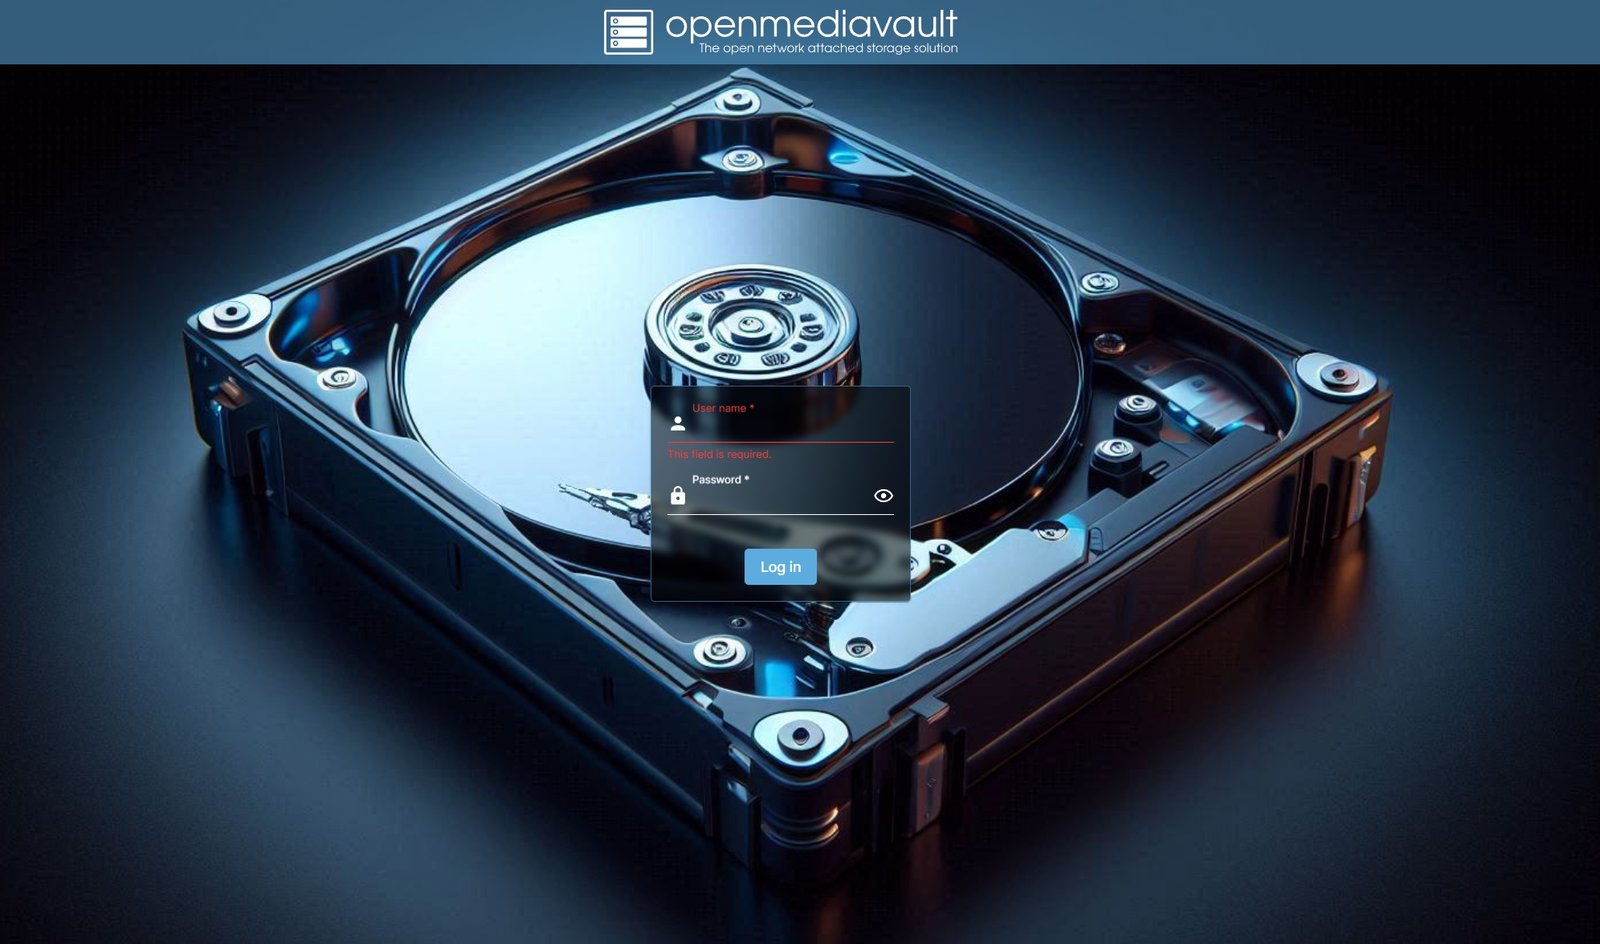
Once completed, open a web browser on your computer and navigate to the local network IP address assigned to your Pi node. Log in using the platform’s default administration access credentials:
- Username:
admin - Password:
openmediavault
Installing OMV Extras and Essential Monitoring Plugins
To unlock advanced features like custom containers and tracking parameters, navigate to the Plugins dashboard panel. Find and enable OMV-Extras, then install these three essential plugin extensions: Compose Plugin, Backup Plugin, and the CPU Temperature Plugin.
Storage Configuration: Setting Up RAID 0 & RAID 1
Before creating network storage pools, we must erase any existing partition maps on our four attached drives.
- In the OMV web dashboard, go to Storage -> Disks.
- Select your first drive, click the Wipe icon, and select Quick. Repeat this step for all four drives.
Building Array A (High-Speed Scratch Pool): RAID 0
Go to Storage -> RAID Management and click the add button (+).
- Name:
Cache_Array - Level: Select RAID 0 (Stripe).
- Drives: Select Drive 1 (SSHD) and Drive 2 (SSHD).
Building Array B (Critical Data Volume): RAID 1
Click add (+) once more inside the RAID management view.
- Name:
Secure_Backup - Level: Select RAID 1 (Mirror).
- Drives: Select Drive 3 (SSD) and Drive 4 (SSD).
Creating the Filesystem Structures
- Navigate directly to Storage -> File Systems.
- Click the create tool icon option and select EXT4 or XFS as your primary partition scheme framework.
- Map the filesystems to your newly built
Cache_ArrayandSecure_BackupRAID containers. - Select each formatted filesystem volume, click Mount, and hit the yellow Apply confirmation bar at the top.
Configuring Users, Shared Folders, and SMB
Step 1: Create a Local User Account
Go to Users -> Users and click the add (+) button. Enter a name (e.g., nasuser) and set a secure password, then click save.
Step 2: Establish the Shared Folder Layouts
Go to Storage -> Shared Folders. Click add (+), name your new target directory (e.g., Network_Share), and choose your secure RAID 1 Secure_Backup storage system volume. Set the access control permissions (ACLs) to grant your user account full read and write access flags.
Step 3: Enable Windows Network File Sharing (SMB/CIFS)
Navigate to Services -> SMB/CIFS -> Settings. Toggle the Enable checkbox flag on, then click save. Switch over to the Shares tab panel, click add (+), and choose the Network_Share directory you created. Set the Public option drop-down selector to “No”, click save, and confirm all outstanding system changes using the top yellow application bar.
Testing Access on Windows File Explorer
Let’s test our configuration from a Windows desktop or laptop computer on your network.
- Launch a new Windows File Explorer window.
- Click inside the long navigation path bar entry field at the top of the screen, clear the text string, and type out your server network path layout using two backslashes followed by your Pi server IP address:
OR something similar, like:
Type this string into the Windows File Explorer address bar to connect to your local network server.
Press Enter. A network sign-in prompt will pop up on your screen. Enter your user account name (nasuser) and the matching secure password you created earlier. Your shared network directory folders will instantly appear as standard accessible folders.
Critical Troubleshooting: Fixing the OMV Network Bug
A common issue that catches many beginners off guard occurs after applying system package updates inside the OpenMediaVault dashboard interface.
Why the Bug Occurs
During system update operations, the underlying network engine can drop its link profile configuration scripts. When this happens, your server loses its router-assigned local network address loop and defaults internally to a local host diagnostic fallback link profile (127.0.0.1). As a result, the web dashboard interface suddenly becomes completely unreachable across your home network.
How to Fix the Interface Offline Error:
If you find yourself locked out of your web dashboard after running updates, don’t panic. You don’t need to re-flash your system card or start from scratch. Follow this straightforward recovery procedure:
- Connect a standard keyboard and computer monitor directly to the HDMI video ports on your running Raspberry Pi 5 node.
- Authenticate at the command line interface prompt using your primary system administrative user account.
- Launch the built-in system interactive recovery tool by typing this command:
This instruction launches the text-based OpenMediaVault system configuration and recovery menu.


- Select Option 1: Configure network interface from the blue menu interface.
- Choose your physical integrated network hardware connection name:
end0(the onboard Gigabit Ethernet interface). - When prompted to configure IPv4 network options, select Yes.
- Choose a Static IP configuration instead of DHCP to keep your server’s network address from changing down the line. Enter a valid, free IP address within your local router’s address pool, type out your standard subnet mask structure (typically
255.255.255.0), add your default network gateway router IP address, and specify your upstream DNS resolution paths (such as1.1.1.1or8.8.8.8). - Select No when prompted to enable IPv6 options, unless your home network specifically requires it.
- Select No when the utility asks to enable Wake-on-LAN features.
- Save your changes and exit the utility interface. The recovery script will rebuild your network configurations, and your dashboard will instantly be reachable again at your chosen static IP address.
Frequently Asked Questions
1. Why should I choose a Raspberry Pi 5 for a NAS instead of a cheap mini PC?
The Raspberry Pi 5 uses very little power when idling, runs completely silently, and features a dedicated PCIe interface that allows you to hook up custom storage expansion boards like the Radxa Penta HAT in a compact footprint.
2. Can I run this multi-bay hardware build using a standard Raspberry Pi 4 board?
No. The older Raspberry Pi 4 lacks the necessary external physical PCI Express expansion bus lanes required to interface directly with the high-speed SATA controller chip on the Radxa Penta HAT.
3. What is the default login password for a fresh OpenMediaVault web panel setup?
The default out-of-the-box username is set to admin, and the matching access management dashboard entry password string is openmediavault. Change these credentials immediately after your first successful login.
4. Why should I avoid connecting multiple storage drives using an external USB hub?
USB connections suffer from protocol overhead bottlenecks and can randomly drop drives out of software arrays due to power management shifts or cable signal issues, which can lead to data loss.
5. How much power does this 4-bay server setup draw under normal operating conditions?
When idling with all four storage drives active, the complete system draws roughly 8 to 12 Watts of power. This is significantly more energy-efficient than traditional desktop server equipment.
6. Can I mix solid state drives (SSDs) and mechanical hard drives (HDDs) in this setup?
Yes, you can mix drive types on the hardware level. However, you should avoid combining different drive speeds or technologies within the same software RAID group to prevent performance issues.
7. What does the `sudo omv-firstaid` command utility do?
This tool launches a text-based recovery menu that allows you to reset network configurations, clear dashboard lockouts, and fix broken management interface access lines directly from the command line.
8. How do I find out what local IP address my home network router assigned to my server?
Log into your home network router’s administration webpage and check the connected client table for your server’s hostname, or run an IP scanner utility on your computer.
9. Is a 4GB RAM Raspberry Pi 5 model enough to handle network file sharing?
Yes. The lightweight 64-bit Lite operating system combined with OpenMediaVault uses minimal system resources, leaving plenty of your 4GB RAM pool available to handle fast network transfers.
10. Why do I need to use a robust 12V 5A power supply for this hardware build?
Four physical storage drives require more power than the Pi 5’s standard USB-C port can supply. The dedicated 12V DC power adapter connects directly to the HAT to safely power all four drives simultaneously.
11. Can I safely turn on PCIe Gen 3 speeds without overheating my system processor?
Yes. Forcing Gen 3 speeds increases data throughput over the interface lines, but as long as you have the Official Active Cooler installed, your system temperatures will stay well within safe limits.
12. What is the difference between a RAID 0 and a RAID 1 storage array?
RAID 0 stripes data across multiple drives for maximum speed and capacity but offers no protection if a drive fails. RAID 1 mirrors your data exactly across two drives, protecting your files if one drive stops working.
13. How do I connect to my server command line using a Windows computer?
Open a standard Windows Command Prompt or PowerShell window and use the built-in SSH connection command followed by your server’s username and network IP address.
14. What open-source filesystem type should I choose for my new RAID volumes?
The EXT4 file system structure is highly recommended for beginner Linux setups due to its excellent reliability, stability under heavy workloads, and native compatibility with OpenMediaVault tools.
15. Can I access my shared network folders when I am away from my home network?
Not by default. To access your files securely when away from home, you will need to set up a secure virtual private network (VPN) utility like WireGuard inside a Docker container.
16. Why do I need to clear old drive data using the Wipe option inside OpenMediaVault?
Old file system fragments or partition tables can conflict with new software RAID management tools, preventing your drive arrays from mounting properly.
17. What exactly is a headless server configuration?
A headless setup is a server that runs efficiently without an attached monitor, mouse, or keyboard. You manage everything comfortably using a remote web browser or secure network terminal lines.
18. Does the Radxa Penta HAT support hot-swapping drives while the system is powered on?
No. Always power down your server cleanly before removing or replacing any physical storage drives to prevent data corruption or electrical issues.
19. Can I run a Plex or Jellyfin media server directly on this system?
Yes. You can deploy media servers like Plex or Jellyfin inside container environments using the built-in Compose plugin features.
20. Why do we modify the aluminum fins on the official active cooler module?
A few of the metal fins need to be slightly cleared to allow the flexible PCIe ribbon cable to route cleanly from the Pi 5 mainboard up to the Penta HAT connector without pinching.
21. How do I change my default network folder permissions inside the dashboard?
Navigate to the Shared Folders options screen, highlight your target directory path entry line, and adjust the access control lists (ACLs) to manage user read and write access flags.
22. What causes the server’s local network address link to change to 127.0.0.1?
When a system package update conflicts with local network management configurations, the interface can drop its connection profile and default internally to its local diagnostic loopback address.
23. Is it better to run my home storage server over Wi-Fi or a hardwired Ethernet cable?
Always use a hardwired Gigabit Ethernet cable. Wi-Fi connections introduce latency and variable speeds, which can cause bottlenecks when transferring large files over your network.
24. Can I use standard 3.5-inch desktop hard drives with the Radxa Penta HAT?
The Radxa Penta HAT interface slots are designed directly for 2.5-inch SATA form-factor drives (SSDs or mechanical laptop drives). Using larger 3.5-inch desktop drives requires separate external data and power extension cabling.
25. How do I safely reboot my server if the web dashboard goes completely offline?
Connect to your server using a secure remote terminal session (SSH) and type the standard system reboot command (sudo reboot) to safely restart the hardware.
26. Can I back up my Apple computer using this custom network storage server?
Yes. You can configure your shared storage folder settings inside OpenMediaVault to advertise itself as an active local destination for Apple Time Machine backup routines.
27. What is an SSHD drive and how does it perform in this storage setup?
An SSHD is a Solid State Hybrid Drive that combines a mechanical storage platter with a small, fast solid-state cache memory block to improve read performance on a budget.
28. How do I add extra security to my user account profiles?
Use strong, unique passwords for each user profile, disable root user logins over remote terminal sessions, and regularly update your system packages to keep security patches current.
29. Can I run automated background backups from my phone to this server?
Yes. You can install open-source applications like Nextcloud or Immich in Docker containers on your server to automatically back up your mobile photos and files over your home network.
30. How do I check the real-time operational temperature of my system processor?
Once you have installed the CPU Temperature plugin extension, your processor’s live temperature readings will be displayed right on your main OpenMediaVault web dashboard status screen.
Future Improvements & Content Opportunities
Now that your core storage server is up and running, you have a solid foundation for expanding your home lab infrastructure. Check out these upcoming guides and resources to unlock even more features on your server:
- Automated Docker Deployments: Learn how to configure container services using the built-in OMV Compose extension.
- Media Streaming with Jellyfin: Turn your server into a private media streaming hub to enjoy your movies and music on any device.
- Photo Storage with Immich: Take back ownership of your photos with a self-hosted alternative to Google Photos.
- Private Cloud with Nextcloud: Set up secure, remote access to your documents and files so you can stay productive anywhere.