Video Instructions: Raspberry Pi Pico 2W – Control Internal LED
Instructions for Raspberry Pi Pico 2W – Control Internal LED
STEP 1 – Search For “Thonny IDE”, Download and Install
Go to your internet browser and search for “Thonny IDE”, and go to this website:
https://thonny.org/
STEP 2 – Connect the Pico 2W and Create New File
Plug your Pico 2W into your computer without holding the BOOTSEL button.
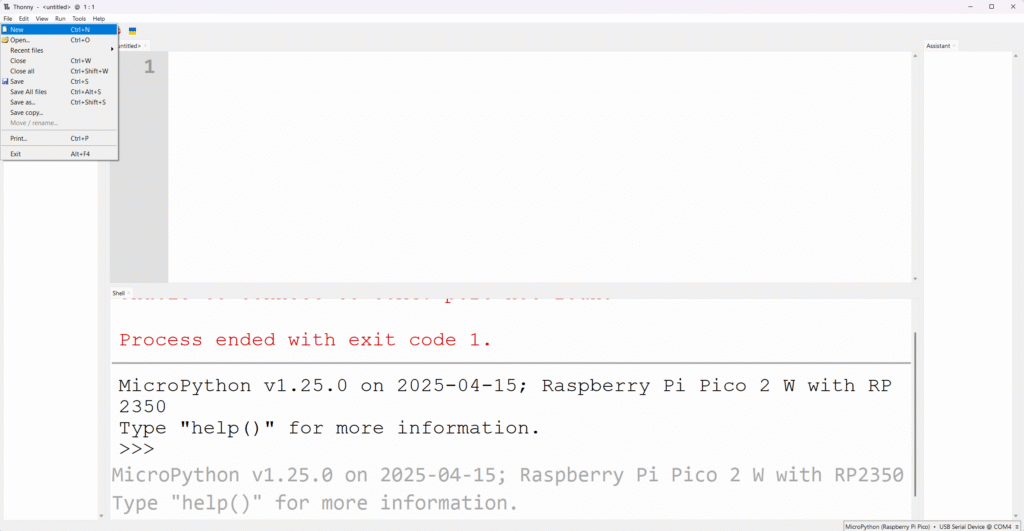
Open Thonny.
In the bottom right corner of the Thonny window, click on the interpreter selection (it might say “Python 3.x” or similar).
Select “MicroPython (Raspberry Pi Pico)” or a similar option if it detects your Pico 2W. The Thonny shell should connect and show a prompt (>>>).
In Thonny, go to File > New.
This will open a new, blank editor tab. You can now write your MicroPython code here.
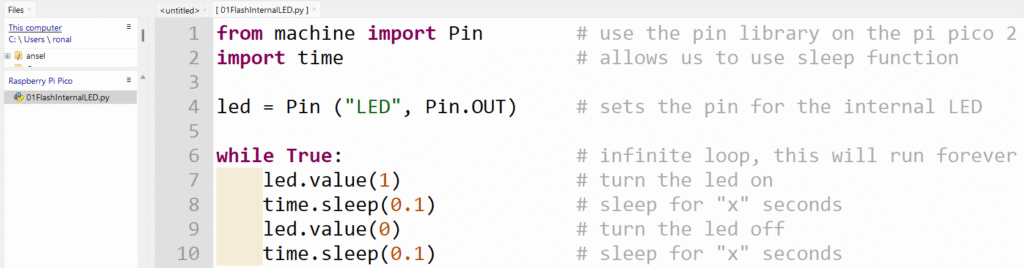
To save it, go to File > Save As…
Choose whether to save it to “This computer” (your PC) or “Raspberry Pi Pico” (your Pico 2W).
STEP 3 – Code for Raspberry Pi Pico 2W Control Internal LED
Run the code by doing one of the following:
- Clicking the Run button.
- Pressing “F5” on the keyboard.
STEP 4 – Copy and Paste Code for Raspberry Pi Pico 2W Control Internal LED
from machine import Pin # use the pin library on the pi pico 2
import time # allows us to use sleep function
led = Pin (“LED”, Pin.OUT) # sets the pin for the internal LED
while True: # infinite loop, this will run forever
led.value(1) # turn the led on
time.sleep(0.1) # sleep for “x” seconds
led.value(0) # turn the led off
time.sleep(0.1) # sleep for “x” seconds